So a few days ago I post one of the cards we will be making in class Saturday. Today I will give you another peek at one more of the cards we will be making.
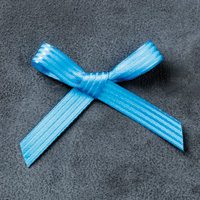
This one I used one of the new incolors for this year. Cucumber Crush. I love that green. I don't think of it as the color of cucumber. But I guess nobody asked for my opinion but you guys are getting my opinion. I still love the color. I added Calypso Coral with it. I love that color too. I love the new twine or thin rope that SU came out with this year. It only comes in a few colors. But Calypso Coral is one of them. I put a glue dot on the clear button and then added a glue dot to add the bow.
I struggled with this stem. When I was first stamping it I did not like it. I could not get it to look clean. Then I realized that my Cucumber Crush is so new that it is too juicy. It kept smearing. So I dabbed a little of the ink off of the pad. Then stamped. Wow what a difference. So when you first get your new ink pads be ware they may be too juicy. Just dab a paper towel on it. You do not need to do it much. Just a little. What a problem to have. Too much ink! That is funny. Usually we complain about not having enough ink. We are only happy when we are stamping and making memories.
Come join me and make great memories. Janice
Sharing my healthy addiction to rubber stamping. I am an independent Stampin' Up Demonstrator.
Friday, July 31, 2015
Wednesday, July 29, 2015
Wild about Flowers Stamp Set
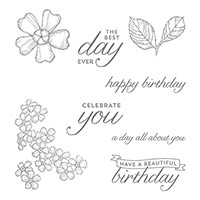
My class this Saturday is a Product Class. This class has been one that many stampers have enjoyed. The reason they like it so much is that they pre-order the stamp set and it is ready for them to use at the class. All 4 cards are made using that stamp set. When they go home they can now stamp more cards using that stamp set. August's stamp set is Wild about Flowers. I love the easy 2 step stamping. Yet there are 3 different flowers and stems to use. The versatility is fabulous.
This is one of the 4 cards we will be making. I love the soft look of this card. Love the framelits and brick wall embossing folder too. We will use Melon Mambo, Daffodil Delight and Tempting Turquoise. This is just one of the flowers in that set. It happens to be my favorite flower in that set.
If you would like to attend the class contact me immediately. I only have one spot left. Janice
Sunday, July 26, 2015
Masculine Card
If you came to my Double Card Class yesterday you made this card. It was a card everyone felt they knew someone that they would send this card to. Many times we have trouble finding cards that we can send to the men in our lives. This stamp set By the Tide (on page 82) has been a popular stamp set. Many people like it because of the coral stamp and the fish stamp. I like it for the lobster too. I have made many cards using this stamp set.
This card was made using Mint Macaron ink. You could use many different colors. I love the look of this. I have seen it made using Night of Navy. I think a Calypso Coral would be pretty but not very masculine. I think any shade of blue would work.
This card was made using Mint Macaron ink. You could use many different colors. I love the look of this. I have seen it made using Night of Navy. I think a Calypso Coral would be pretty but not very masculine. I think any shade of blue would work.
Friday, July 24, 2015
Birthday Card
Are you looking for a quick and easy birthday card to make? Well I have one for you. This is a short post today. I got up late and have to get to work. But here is a birthday card for you. Janice
Thursday, July 23, 2015
Sheltering Tree
Today's card is one that I created. No copying anyone. This was all me. Here it is.
I started out by using the Watercolor Wash background stamp (found on page 129 of the main catalog). I used So Safron as the ink color. Next I stamped the tree trunk using Tuxedo Black ink. Then I stamped the leaves using Old Olive ink. Next I stamped the bike in Tuxedo Black and added the bars to the bike using Old Olive. When I was trying to put words on the card front, I decided to put it at an angle. It was purely an accident. But I think it turned out great. This is another card that will be made at my Double Cards Class on Saturday, July 25th at 9am. Have you signed up for it yet? I keep the group size to 8 so that everyone can stamp in a timely fashion. At this time I have 5 people signed up. So only 3 spots left. Janice
I started out by using the Watercolor Wash background stamp (found on page 129 of the main catalog). I used So Safron as the ink color. Next I stamped the tree trunk using Tuxedo Black ink. Then I stamped the leaves using Old Olive ink. Next I stamped the bike in Tuxedo Black and added the bars to the bike using Old Olive. When I was trying to put words on the card front, I decided to put it at an angle. It was purely an accident. But I think it turned out great. This is another card that will be made at my Double Cards Class on Saturday, July 25th at 9am. Have you signed up for it yet? I keep the group size to 8 so that everyone can stamp in a timely fashion. At this time I have 5 people signed up. So only 3 spots left. Janice
Wednesday, July 22, 2015
Birthday Blossoms
Today's card is an example of how I too CASE other people. You do not have to be an artist or creative to do stamping. You can copy. I am always honored when someone tells me they copied my card. Nobody copies something they don't like! So be proud and help someone else to be proud.
My card is from Mary Fish. Mary has been a SU demonstrator a long time. She does beautiful work. I love her clean look. Her cards are clean and seldom too much stuff on them. So thank you to Mary Fish for sharing this card. I loved it so much I did not even change the colors she used.
Isn't this card just stunning? I love it. I always love black and white and then pop it with a bold color. Well this card has the two bold colors Melon Mambo and Pacific Point (and Garden Green). The flower coordinates with the SU pansy punch. You do need to cut out by hand the leaves but that was pretty easy. I love the Pacific Point stitched satin ribbon. The DSP is Everyday Chic. I am doing this card with my Hostess Club this month. Do you think they will love it? Janice
Monday, July 20, 2015
Double Card Class
Do you like to make one card for you to keep and one to give away? My Double Card Class is meant for you. These are quick and fun cards to make for any level of stamper. No cutting or coloring to do. My new stampers love this class because they are not overwhelmed with lots to do. Yet the stampers that have been stamping for a long time love this class because they cannot bare to give away their cards. So they can keep one and actually share one with someone special (or even not too special haha). They also enjoy it because they tweak it to put their flare on it.
The next Double Card Class is Saturday, July 25th at 9am. Most stampers are done in an hour and a half. You go home with 10 cards and 10 envelopes. The cost is only $15 for all 10 cards or FREE by placing a $20 order that day.
Here is a picture of the 5 cards.
Now you are not getting to see every inch of them. But you can see that they are all interestingly beautiful. Yes you get to see the one with the tree and bike. I love that stamp set. It is so versatile.
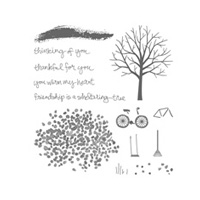
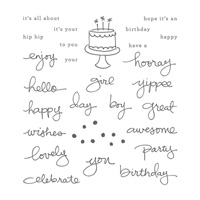
Here are the stamp sets we will be using in the Double Card Class.
Sunday, July 19, 2015
Sympathy Card
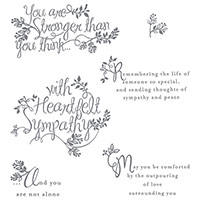
It is always sad when someone passes. I don't know about you but I find it difficult to know what to say. I rehearse in my mind what I am going to say. (Come on you do too. Don't you?) When the new catalog came out I was so happy to see such a wonderful stamp set for sympathy cards. It is a way I can give someone something special to let them know I care. Giving cards is so meaningful to so many people. It is something that they can keep forever. I have a shoe box (I decorated it) to keep cards and note from people that made an impact on my life. I pull that box out periodically and reread them. It brings me right back to that moment they were talking about. So never think your cards are not meaningful. You never know who might have kept it without you knowing. Touch someone's heart by sending a card.
Okay so today's card is one we will be making in my Double Cards Class on Saturday, July 25th at 9:00am. The class is only $15 for 10 cards (or Free with an order of $20). You cannot go wrong with this class.
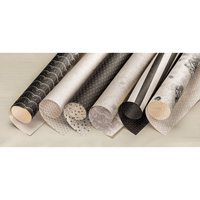
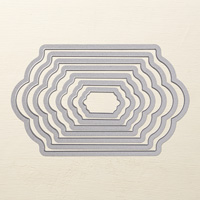
This card is so beautiful. It uses Very Vanilla and Basic Black. The Designer Series Paper is so beautiful that people do not want to cut it. Well I will cut my sheet for you to use on this card. It is so beautiful (oh I said that already). The framelit I used is Lots of Labels. I trimmed off the one end to fit on the card. I wanted more of that beautiful paper to show. I love SU framelits because they are so easy to use and love how you can layer things so perfectly. The DSP is called Timeless Elegance. It is so beautiful. The picture in the catalog does not do it justice. Trust me!!!! You gotta get this. The stamp set is Heartfelt Sympathy found on page 27 of the main catalog.
Order this stamp set so you can have beautiful sympathy cards ready for those unexpected moments. Or to give to someone else that needs a card to give to someone else. Go over to the right and click on the Stampin' Up logo and it will take you right to the SU website. Take care and give those that you love a hug and tell them how much you love them. Janice
Friday, July 17, 2015
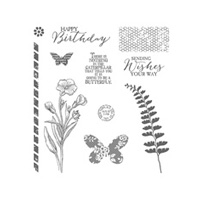
Wild about Flowers
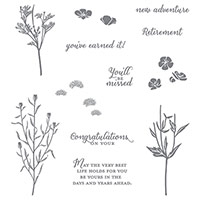
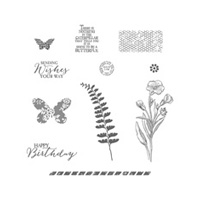
Every other month I do a product class. August is my next product class. It is Saturday, August 1st at 9am. I choose a stamp set and make 4 cards using that stamp set. You order your stamp set from me by July 22nd. Then on Saturday, August 1st you come and use your stamp set to make the 4 cards I have prepared for you. It is a great way to get a new stamp set and find ways to use that stamp set. Here is the stamp set.
Your cost for the stamp set, shipping, tax and 4 cards is $25. You must order by July 22nd. So do not miss that date. I want to make sure everyone has their stamp set the day of the class.
Here is a sample of one card I have made with my hostess club using this stamp set.
I love the sayings in this set also. New adventure, Retirement, you've earned it! Those are sayings we need but have not had much in stamps with those sayings. Remember to contact me to order your stamp set. Janice
Here is a sample of one card I have made with my hostess club using this stamp set.
I love the sayings in this set also. New adventure, Retirement, you've earned it! Those are sayings we need but have not had much in stamps with those sayings. Remember to contact me to order your stamp set. Janice
Thursday, July 16, 2015
Hostess Club
Do you enjoy learning new things about stamping? Do you enjoy laughing with others? Do you enjoy getting free hostess awards? Do you enjoy stamping? If you answered yes to any of these Hostess Club might be right for you.
What is Hostess Club you ask? Well Hostess Club is a group of people (4-10 in a group) that meet once a month to stamp 3 cards I prep and design for them. They come and learn, stamp, laugh and order $25 of product that day. They meet 4-10 months depending on how many are in the group. Each month one of them is the hostess for that month. That person then gets the hostess rewards without having to invite everyone they know. Right now a group of 6 are starting a new round of their Hostess Club. If you would like to join in the fun contact me. This group has the choice of coming the 3rd Sunday at 1pm or the 4th Wednesday at noon. This has allowed each of them not to miss a stamping time. It can fit into your schedule. This month some are coming on Sunday, July 19th at 1:00. Then the rest are coming on Wednesday, July 22nd at noon.
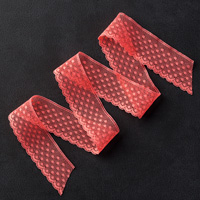
Here is a sample of one of the cards we will be making. The stamp set is a hostess only stamp set. It is using 2 of the new incolors, Mint Macaron and Tip Top Taupe. Don't you just love the Blossom Accents? We are also using the Tip Top Taupe Dotted Lace Trim. It is at the bottom of the card. It is not easy to see it in this picture. But trust me you will love it.
I hope you will decide to join this fun group. Janice
Tuesday, July 14, 2015
Washi Tape
Washi Tape is an easy way to add to a card with ease. This card I used in June's Double Card Class. I love this washi tape. I like black and white and grays. You could use any color to make the card pop. I chose to use Watermelon Wonder. I folded the Watermelon Wonder lace trim but many of my customers wanted the beautiful lace to show completely so they did not fold it. The stamp set we used is a new stamp set this year. I'm loving it. It is called "Timeless Love" found on page 29. It is one that popped out at me right away because of the font that is used in the words. Plus it has two of the phrases are phrases I need. Happy Anniversary and You make my Heart Smile.
I can guarantee I will have more ideas using this stamp set soon. I hope you will consider trying my Double Card Class the 4th Saturday of July. We start at 9am and you will be done by 11 (or sooner). 10 cards for $15 or 10 cards for FREE with an order that day of $20. This is a great class to take so you get 10 cards and new product! I am limiting this class to 8 people so make sure you sign up ahead of time. Janice
Friday, July 10, 2015
Butterfly Basics
This card is one of the cards I will be doing in my 4 cards for $10 class this month. I have 3 openings left for Saturday's. I hold this class on two different days per month because it is a favorite class for many stampers. The other times will be Wednesday, July 22nd at 9am or 2pm. I have openings as of today for both of those classes. RSVP to be sure that I cut and prep cards for you.
The colors I used are Wild Wasabi and Rich Razzleberry. Love those two colors together. The ferns in this stamp set are one of my go to stamps. I just love adding the fern to many cards. The little butterflies can be punched out with one of SU punches. Both butterfly punches are a must have. They make butterflies easy to add to any card or scrapbook page. The striped paper on the side is from the Brights Color Collection paper. I just cut a small strip to add to the side. It added so much to the card. It pulls your eye around the entire card front.
Shopping for SU items is easy. Click on the button to the right. Takes you right to the SU website. I look forward to helping you make great cards to put a smile on your friends, family and coworkers faces. Janice
Thursday, July 9, 2015
Timeless Love Stamp Set
I bought Timeless Love stamp set because I did not have a stamp that I liked with Happy Anniversary. Well this stamp set has a beautiful font with those words and two other great phrases. "You Make my heart smile" and "Congratulations". They are beautiful. Elegant. I also loved the two flower stamps. They are easy to work with and take little skill to color. Here is my card that I made after seeing others on Pinterest with the same layout. I changed the color and added DSP to it.
In this picture you can see I used the smaller flower on the inside. I chose Wisteria Wonder as the dominant color. That way I could use the DSP Wisteria Wonder with the little flowers. You could use the dots with it also. I added Basic Gray to outline the Wisteria Wonder.
Here is another closer look at the front of the card. I can see this card being used for Anniversaries of course. But you could also put a sympathy statement on it and that would be perfect too. A wedding card (Congratulations), a birthday card, etc.
Now you could use many other colors also. Let me know what colors you decide to use with this. Click on the link to the right that says order here Stampin' Up. You too can have fun with this stamp set and get many people telling you how beautiful your cards are. Janice
Wednesday, July 8, 2015
Washi Tape
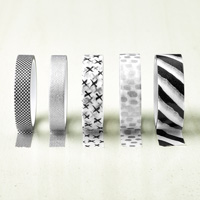
Today I have a storage tip for you. I have struggled for years to store my washi tape. I've tried containers that are like a tape dispenser and found that to be difficult to take on and off when I use washi tape for a class. Then I tried keeping them in a basket. Could never find what I was looking for. Then tried a plastic container that I could see the tape easily but struggled know which washi tape came with other washi tape. I like to blend my colors correctly. Well I read Patty Bennet's blog and saw how she stores her washi tape. Well I thought this was worth trying. So I have and I think I have finally found a way that will work for me.
Yes it is using a clasped ring. This one is fairly large. I was able to put all of the washi tape that came together in the package on one. If you notice the black circle that is where I have the label of what the washi tape is called and the number to order it by. Now I can still take a roll off easily and put it back on easily. I don't have to take them all off and on to get to one roll. Isn't that clever? Thank you Patty for sharing. And now I am sharing too.
In this picture you can see the other washi tape. It is on the same size ring. I also made sure the label was showing in the picture so you can see what I mean by having the name of the washi tape and the number. I punched a circle out of black cardstock and adhered the label onto it. I use my hand held circle punch and punched a hole in the middle of it and stuck it on. I now throw these into a basket so I can see the colors and pull it out with all of them on it. So far I am loving it and it is working for me.
Let me know if you like this idea and if you try it. Janice
Monday, July 6, 2015
Sheltering Tree
This stamp set was a must have when it first came out last January. It was so popular. I love stamp sets that can be used for every season. This is definitely one of them. Today I used this stamp set to make a thinking of you card. It is very simple and clean. I think this will be a good card to be given to someone for a sympathy card.
I colored a clear block with 3 colors of marker. Bermuda Bay, Delightful Dijon, and Mossy Meadow. Then I lightly spritzed it with water. Then laid it gently onto the paper and let it sit for a minute. That gave it the blended look. I put the Bermuda Bay marker in the middle of the bottom of the block and added the Mossy Meadow marker on the sides. The Delightful Dijon marker was at the top and then added one line of the Bermuda Bay at the very top. My thought was to make it look like there was a creek or water just behind the tree. Do you see that? Janice
I colored a clear block with 3 colors of marker. Bermuda Bay, Delightful Dijon, and Mossy Meadow. Then I lightly spritzed it with water. Then laid it gently onto the paper and let it sit for a minute. That gave it the blended look. I put the Bermuda Bay marker in the middle of the bottom of the block and added the Mossy Meadow marker on the sides. The Delightful Dijon marker was at the top and then added one line of the Bermuda Bay at the very top. My thought was to make it look like there was a creek or water just behind the tree. Do you see that? Janice
Subscribe to:
Comments (Atom)


