Sunday, June 30, 2013

Butterflies Butterflies

Good Morning My Stamping Friends

I love to look at butterflies.  They are so beautiful.  I'm not a huge fan of snow.  But butterflies remind me of snowflakes.  Each one is different.  Each color in a butterfly is so unique.  Here are just a few samples of two cards I did using the butterfly from the 25th Anniversary Set.  We stamped the butterfly using black stazon ink.  Then using an aqua painter and Daffodil Delight, Strawberry Slush and Midnight Muse reinkers, we painted them on what ever way we wanted.  Everyone's was truly different.  Everybody loved everyone's.  Then we let it dry a few minutes.  Next we added on each wing, Dazzling Details.  We used a cheap watercolor paint brush and spread it on the wings.  Add a strip of Crystal Effects on the body.  Let it dry.  Then cut it out.  I hope you like them too.


Gotta run today.  Hope you enjoyed these cards.  Would love to hear a comment from you.  Janice

Saturday, June 29, 2013

Wildflower Meadow

Well this is a stamp set that has sooooo many options.  I think my favorite is embossing it on Designer Series Paper.  I hope you like this.


The Designer Series Paper I used was from Gingham Garden - Page 153 main catalog
Wildflower Meadow - Page 83 main catalog
wood - $17.95 129165
clear - $13.95 129168
Wildflower Meadow Embossing Folder - Page 191 main catalog
$7.95 129376
Simply Pressed Clay - Page 167 main catalog
$6.95 130685
Buttons & Blossoms Simply Pressed Clay Molds - Page 167 main catalog
$7.95 131272

I used the clear stamp set.  I don't even put it on the clear block.  I have found that it works best to lay the stamp facing up.  Then I ink it and place the cardstock on top of it.  I use a scrap of paper over it to allow for me to press on it to make sure I get all the ink (or versa marker) on it.  You just have to remember to make sure you get the humming bird on the cardstock so lay your paper high enough up.  Nothing worse than cutting off part of the humming bird wing or head.....

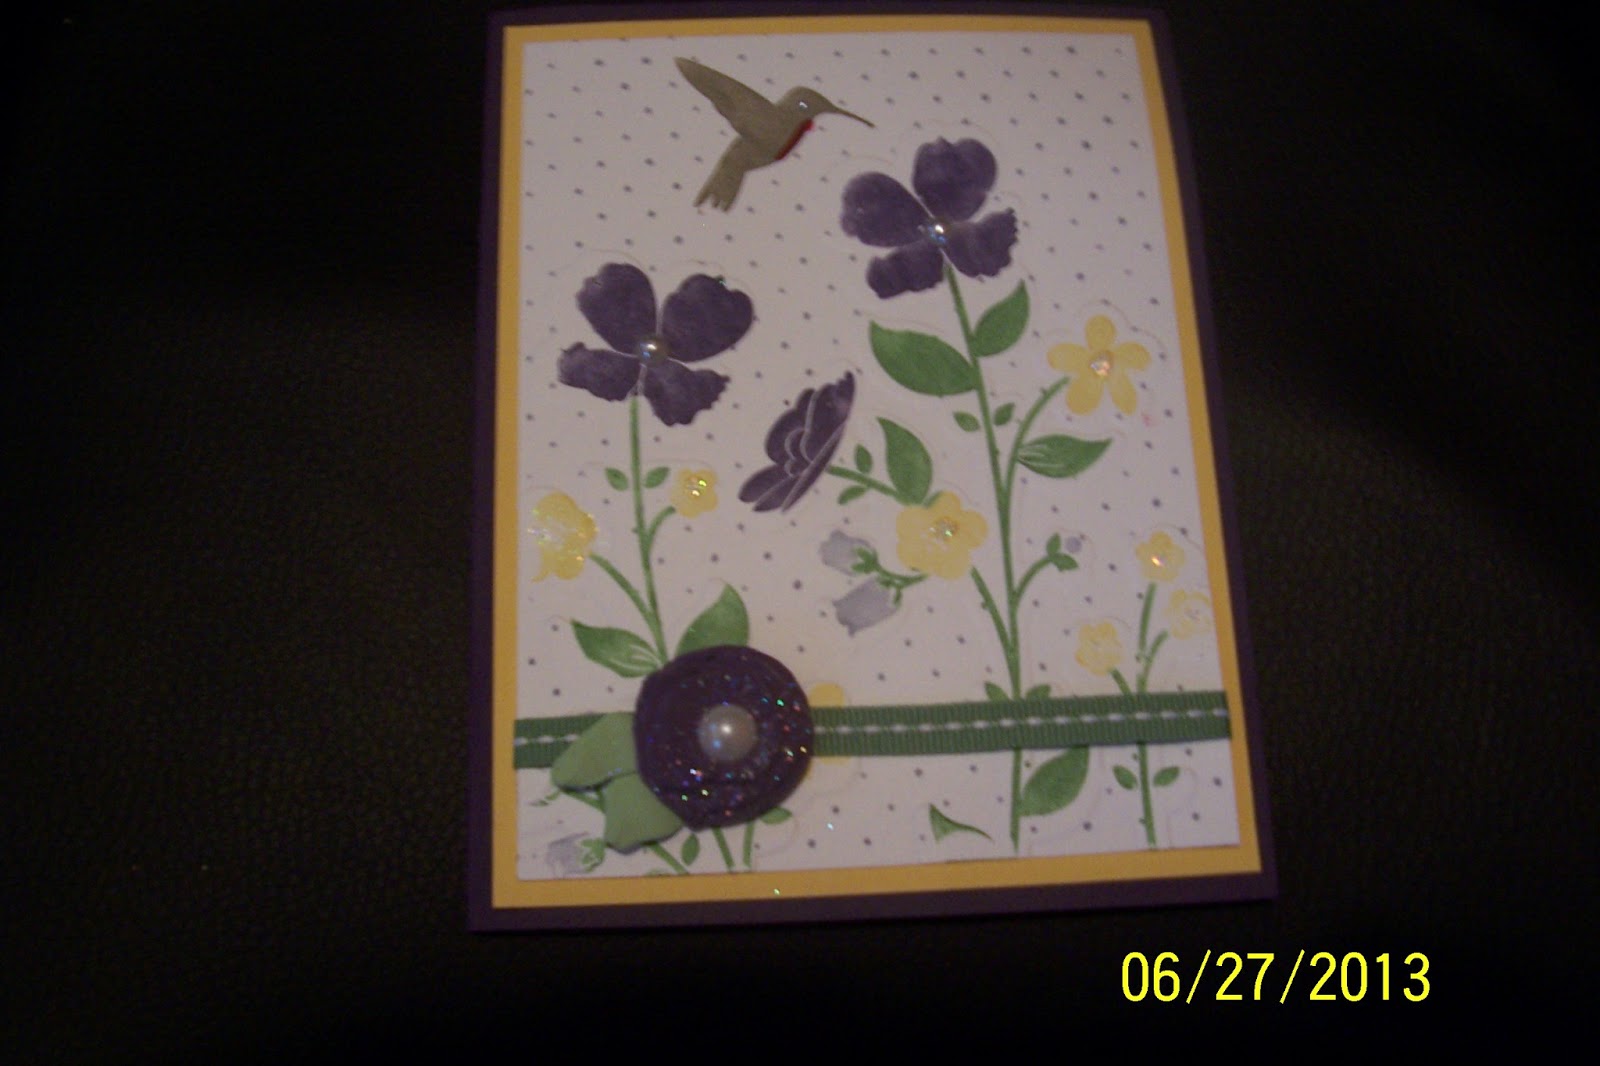
The next card takes a little more time but is so worth it.  I used my markers to color many different colors.  Yes even the dots.  It really was not that bad.  Try it you just might like it.  Then there is an embossing folder that goes with it!  You just lay the front piece into the embossing folder making sure the indented side is facing up.  You can see the stamped image to line it up easily.  Run it through the Big Shot.  Now you have your flowers raised.  It is gorgeous.  You cannot see it very well in my picture but I used our Dazzling Details in the center of the smaller flowers.  And of course added our pearls in the center of the larger flowers.

The Elegant Eggplant flower on the Wild Wasabi ribbon was made using SU new clay.  I'll admit that when I first saw that SU was selling clay I was a little (maybe a lot) skeptical.  But oh my!!!  It is so fun and so easy to work with.  You can add your reinker to the white clay and make it as light or dark as you want.  I made the Elegant Eggplant to go with the flowers in the stamp we were using.  I found adding Stampin' Glitter to the mold first than putting the small piece of clay in, made it easier to pop out.  And what girl does not like sparkle.......  Then I just hand made a few green leaves and used my poker and laid it on the middle of the leaf to give a little more detail.  I attached the leaves before the flower was dry.  Then left it for 18 hours or so.  It dries easily.  What surprised me is that it is not super hard.  It still has a little give to it.  It is very light weight.  I added a pearl to the middle.  I found our multipurpose liquid glue worked the best to hold it (mini glue dots did not hold well).  I will say that the clay goes a long way.  It comes in a resealable bag.  If you make too much of one color put it in a different resealable bag and save it for another time.  I made probably 50 and only used about a 1/4 of the bag.  If you are having trouble getting the clay out of the molds put in the freezer for about 5 minutes and then it will be a little firmer to get out.  The more you play with it the softer it gets.  That makes it more difficult to get out of the mold. 


Markers I used were Elegant Eggplant, Wisteria Wonder, Daffodil Delight, Wild Wasabi, Soft Suede and Cherry Cobbler.  Have fun trying these fun stamping techniques.  Janice

Friday, June 28, 2013

Blooming With Kindness

Today I have a card that uses one of my newest favorite Stampin' Up colors.  Crisp Cantaloupe!!!  I have always loved the color peach but now I see it was really Crisp Cantaloupe that I just did not realize the name! 


Blooming with Kindness Stamp Set - Page 65 main catalog
Wood $22.95 131961
Clear $16.95 126422
Big Shot Magnetic Platform - Page 184 main catalog
$39.95 130658
Standard Cutting Pads - Page 185 main catalog
$8.95 113475
Adorning Accents Edgelits - Page 188 main catalog
$9.95 125595

I love the 5 sayings that come in this set.  The flower is beautiful in many different colors. 
The other great thing about this card is the layering.  The Crisp Cantaloupe goes across the front to make it easier for everyone to layer.  The Midnight Muse cardstock is just 2 inches wide but I made the length to be 5 1/2 inches long.  Using the new Big Shot Magnetic Platform made cutting the Adorning Accents Edgelits easy peasy.  We cut the Midnight Muse and the Whisper White piece.  Then attached the Midnight Muse piece to the backside of the Whisper White piece.  By having the Midnight Muse slightly longer made it easier to line up.  Then trim off the ends.  Then each person decided how much they wanted cut off of the left side of the Whisper White by laying it down on the card front to decide how much of the Crisp Cantaloupe they wanted to show.  Added the dahlia to the card.  Many of the stampers stamped the flower on their envelope.  

Helpful hint - use very flat cutting pads with framelits and edgelits on the magnetic platform

Have a super fantastic day.  Janice

Thursday, June 27, 2013

Hi My Stamping Friends

The card today is one I had at my card class last week.  My stampers loved it.  They talked about being able to make this card over and over with many different colors and stamp sets.  I loved to give you cards that you can make again and again.


This card is using whisper white cardstock.  There is an top layer of whisper white that we used from the window frames collection.  Once we cut that out we marked with a pencil a few spots on the top and the sides of the main card.  This was done so when we were using the sponge daubers we were sure not to put ink too far to the edges.  You could use a template and just sponge over it but I wanted to show how they could do it without using a template.  We used daffodil delight, pumpkin pie and tempting turquoise for the ink.  Remember to start with the lightest color and work your way up.  Blend the two colors slightly. Also to avoid getting large circles make sure to sponge some of the ink off on your scrap paper and use circular motions with the sponge daubers.  You can keep checking to see if you have colored enough by placing the front piece on.  Once you are happy with your sponging, adhesive the front on. Then using black stazon ink we stamped the stamp from Serene Silhouettes (page 64 of main catalog wood $24.95 132073 or clear $17.95 127324).  You could use 3 of the 4 stamps from that set, just depending on what you want.  That is a great set.  We then stamped the same stamp on the inside.  If by the layer on the front did not catch all of the image use the fine point of your black marker to draw in lines.  Some of my customers were nervous they would ruin their card by doing it.  But they were glad they did it.  

I hope you liked this card.  Have a great stamping day.  Janice